Ansible Content Collections: The Sensu Go Use Case
February 10, 2020 - Words by Manca Bizjak - 8 min read

This post was originally published on the Ansible blog .
In Getting Started With Ansible Content Collections , which presented the general idea behind what is becoming a new standard in the distribution of Ansible content, we learned about the what, the why and the how of Ansible Collections (and hopefully it got you excited about Ansible Collections!). In this post, we’ll take things a bit further, continuing the journey into the world of Ansible Collections accompanied by the certified Sensu Go Ansible Collection that our team at XLAB Steampunk developed and supports for Sensu .
What to expect?
This article will guide you through the process of creating a fully functioning automated deployment of the Sensu Go monitoring agent and backend with the help of roles and modules included in the Sensu Go Ansible Collection.
If you are not familiar with Sensu Go, this quick introduction to Sensu Go will help you get up to speed.
Before we begin, let’s first talk about the collection we’re taking along for the ride.
The Sensu Go Ansible Collection: the basics
What exactly do we need for a complete and fully functioning deployment of Sensu Go? First, the Sensu Go monitoring backend. Then, to allow the backend to play its part, we need to configure Sensu Go agents so that they will collect some data about the monitored systems and feed that data to the backend. And of course, as the end-user, we also need to interact with the Sensu Go backend. For example, we probably want to manage various resources that live on the Sensu Go backend, further tweak the backend configuration to our needs, and finally, gain insight into what goes on in the monitored setup.
This is where the Sensu Go Collection steps in. It provides:
- a backend role we can use to install, configure and run the Sensu Go backend,
- an agent role for deploying Sensu Go agents,
modules for managing Sensu Go resources, for instance:
user,role,asset,entity,check,filter,event, etc. - Modules for retrieving information about Sensu Go resources, for instance:
user_info,entity_info,asset_info, etc.
Now that you’re equipped with some background knowledge about Sensu Go and the Sensu Go Ansible Collection, let’s spin up a terminal and try it out!
Installing the Collection
First, ensure that you have Ansible version 2.9 or above installed on your
system (ansible --version might come in handy).
Installation with ansible-galaxy
You might already be familiar with ansible-galaxy, a tool that allows us to
install Ansible roles. Since the Ansible 2.9 release, it also works with
collections. By default, ansible-galaxy searches for Ansible content
published on the
Ansible Galaxy portal
. The Sensu Go Collection
lives in the sensu namespace and is called sensu_go. You can refer to the
collection by specifying its namespace and name: sensu.sensu_go. Feel free to
explore Sensu
Go Collection on the Galaxy portal
.
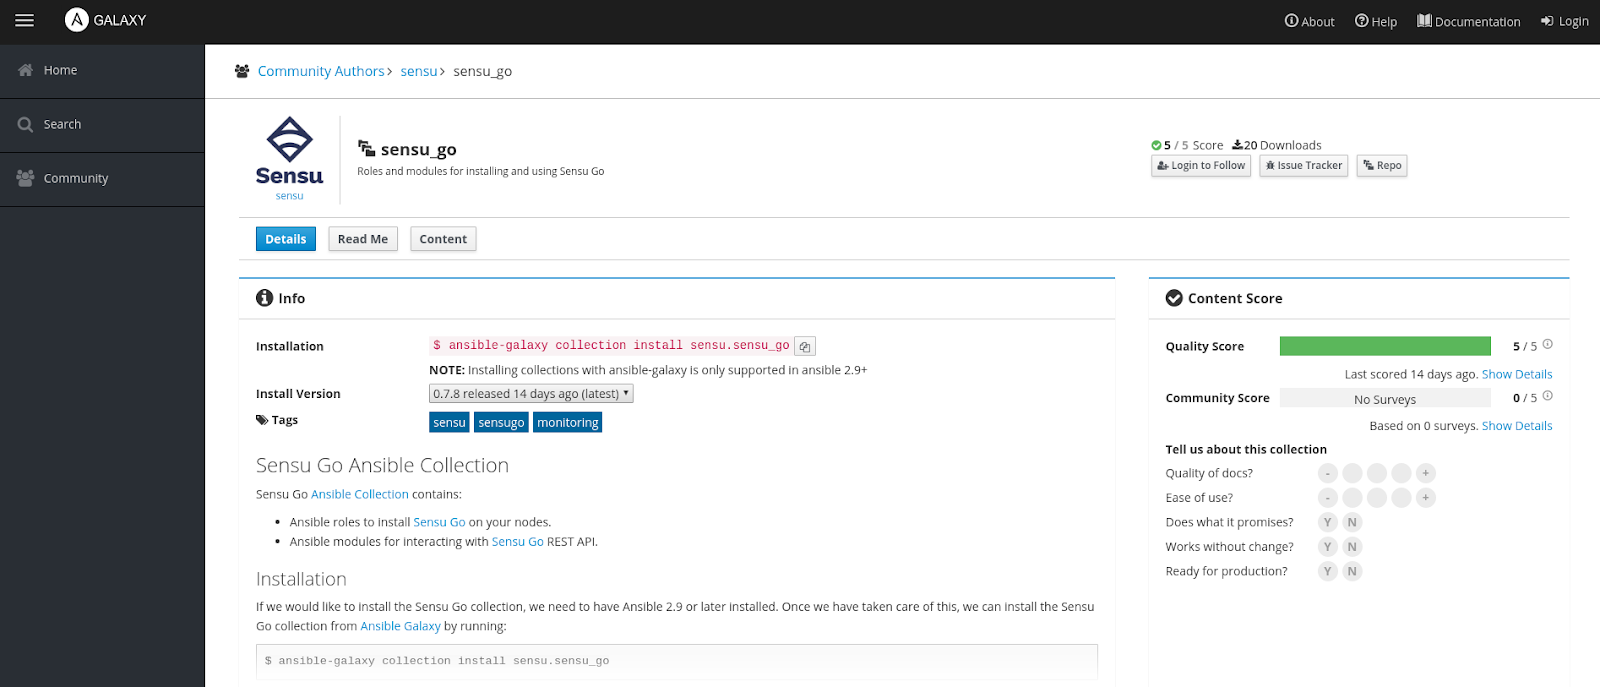
Sensu Go Ansible collection's Galaxy page
When you’re ready, run:
$ ansible-galaxy collection install sensu.sensu_go
If everything went smoothly, you should expect to see output similar to the one below:
Installing 'sensu.sensu_go:' to
  '/home/user/.ansible/collections/ansible_collections/sensu/sensu_go'
You can install any collection published on Galaxy in a similar manner.
Retrieving certified Ansible content from Automation Hub
The Sensu Go Ansible Collection is certified Ansible content; it adheres to Red Hat’s quality standards, and Sensu provides support for the contents of the collection. Along with other certified Ansible content, the Sensu Go Ansible Collection is available to Red Hat Ansible Automation Platform subscribers via Red Hat Ansible Automation Hub . To access it, log in with your Red Hat account and visit the Sensu Go Collection page .
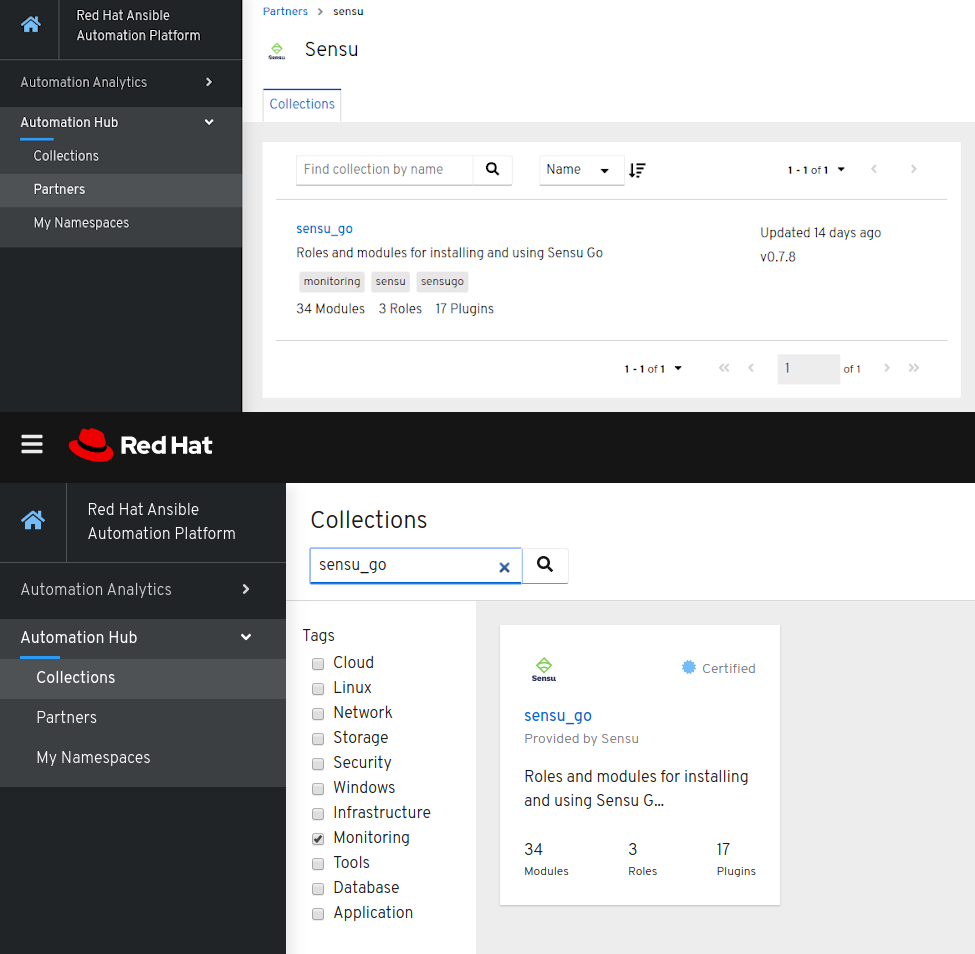
Sensu on Automation Hub
Ansible Automation Hub gives you the benefit of having all collection documentation available in one place.
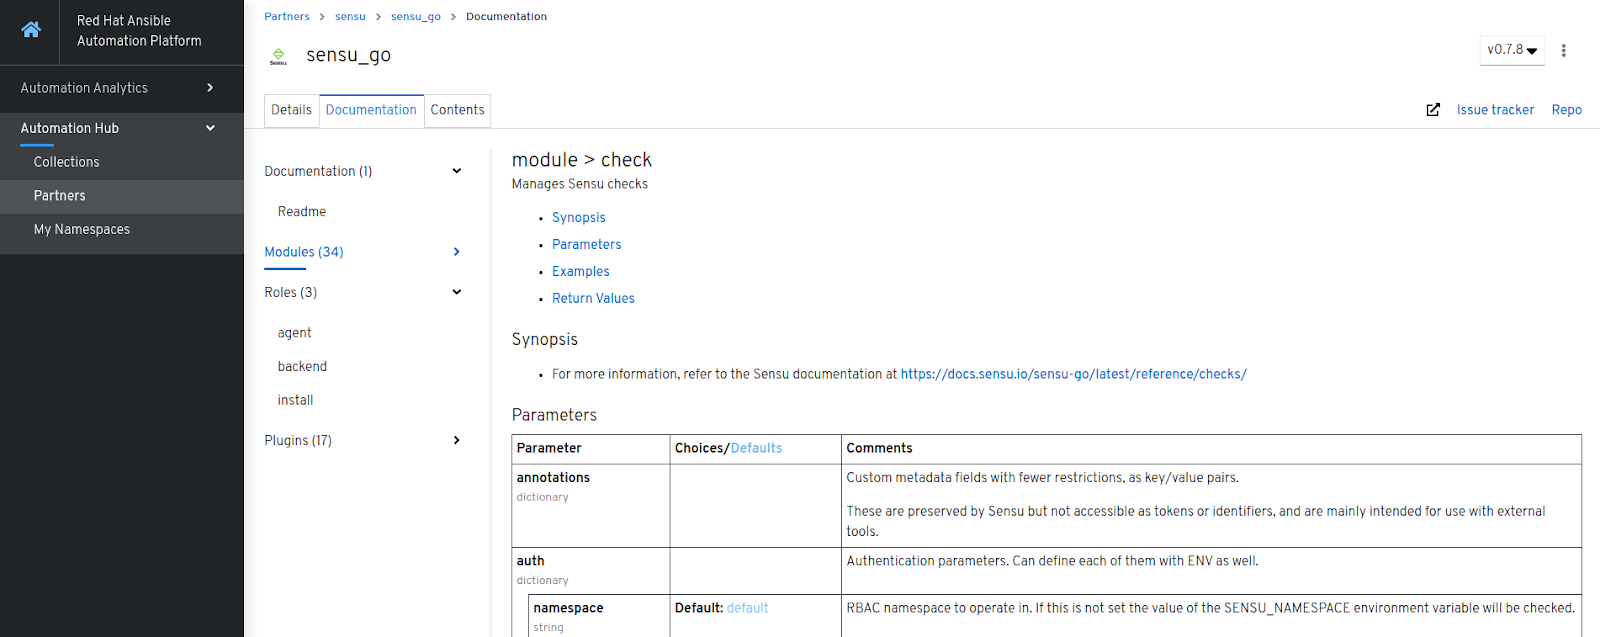
Sensu Go Ansible collection's documentation
You can configure ansible-galaxy to fetch certified content like the Sensu Go Ansible Collection straight from the Automation Hub. Read more about it in this post on getting started with Automation Hub .
Verifying installation
If everything went according to plan, the Sensu Go Collection is now installed on our workstation. We can verify this by running:
$ ansible-doc sensu.sensu_go.asset
which should output documentation for the asset module.
Setting up system clock drift monitoring with Sensu Go, the Ansible way
Now that we have successfully installed the collection, let’s move on to the fun part.
For the purpose of this guide, let’s imagine that we maintain an application server. Incidentally, we notice that timestamps in the application server’s logs seem a bit off. We don’t know exactly what’s happening, but the first thing that comes to mind is to check whether the system clock has drifted. To get to the bottom of this, we will deploy Sensu Go and set up system clock drift monitoring using roles and modules from the Sensu Go Ansible Collection. Our setup will comprise a single Sensu backend node and a single Sensu agent reporting clock offset with the NTP server. Note that we will deploy Sensu agent on the node that is hosting our imaginary application server.
1. Preparing the inventory
In the following example we assume that the Sensu backend and agent run on separate hosts, both different from the workstation we are using to run Ansible commands. Our workstation is the Ansible control node, while nodes where we will deploy Sensu components to are Ansible-managed nodes. Apart from making sure we can ssh to them, we won’t need to interact with them directly - Ansible will do this for us.
The inventory in our example is very simple. To let Ansible and the roles from the Sensu Go Collection know where to deploy which Sensu component, we need to associate IP addresses of the managed nodes with backends and agents groups.
$ cat > inventory << EOF
[backends]
192.168.50.2 # Substitute with the IP of your backend

[agents]
192.168.50.3 # Substitute with the IP of your agent
EOF
In this guide, we omit the SSH connection details from the inventory file or ansible-playbook commands that will follow, as they depend on the configuration of your environment. Make sure you can ssh to backend and agent nodes and pass connection options to Ansible if necessary.
2. Writing a playbook
Next, we create a playbook sensu-go.yml. For now, we add two plays that will install, configure, and run Sensu Go components - one for backend, another one for the agent. Each play will make use of the respective role from the Sensu Go Ansible Collection by listing sensu.sensu_go.[backend|agent] under the roles field, and will be applied to the appropriate host group (backends or agents).
$ cat > sensu-go.yml << EOF
---
- name: Install, configure and run Sensu backend (latest)
  hosts: backends
  become: true
  roles:
    - sensu.sensu_go.backend

- name: Install, configure and run Sensu agent (latest)
  hosts: agents
  become: true
  roles:
    - sensu.sensu_go.agent
  vars:
    agent_config:
      deregister: true
      keepalive-interval: 5
      keepalive-timeout: 10
      subscriptions:
        - linux
EOF
The first play uses backend role defaults, while the second one provides the desired agent configuration via the vars.agent_config. Similarly, we could override the role defaults used in the first play by providing vars.backend_config with custom configuration. Configuration options under agent_config and backend_config mirror those supported by sensu-agent and sensu-backend commands, respectively. Visit documentation pages for agent and backend roles if you’re interested to learn more.
If we ran the playbook against our inventory now, we would end up with an
up-and-running Sensu Go backend and agent. But before we do that, let’s add
the final, and a slightly more interesting play to our playbook. This last
play will run on localhost (our workstation) and will execute tasks leveraging
sensu.sensu_go.* modules that interact with the Sensu Go backend.
To monitor clock drift on the agent node, we need to set up a Sensu check. Checks allow Sensu agents to run commands periodically and produce monitoring events. Commands to be run in the scope of a check are provided by programs packaged in reusable bundles called Sensu assets. The most common ones are available through Bonsai , the Sensu asset index.
The first task in our play will use the bonsai_asset module from the
collection to fetch the asset definition from Bonsai and create the asset on
our Sensu Go backend. We then add another task that creates a check, using the
check module. As module arguments, we provide the specific command to be run,
its schedule, and a reference to the previously added asset.
$ cat >> sensu-go.yml  << EOF
- name: Configure your first monitor
  hosts: localhost
  collections:
    - sensu.sensu_go
  tasks:
    - name: Create sensu asset
      bonsai_asset:
        auth: &auth
          url: http://:8080
        name: sensu/monitoring-plugins
        version: 2.2.0-1

    - name: Create sensu ntp check
      check:
        auth: *auth
        name: ntp
        runtime_assets: sensu/monitoring-plugins
        command: check_ntp_time -H time.nist.gov --warn 0.5 --critical 1.0
        output_metric_format: nagios_perfdata
        publish: true
        interval: 30
        timeout: 10
        subscriptions:
          - linux
EOF
3. Running the playbook
To demonstrate Sensu Go monitoring in action, we need to run the playbook from the previous step against the inventory we prepared earlier:
$ ansible-playbook -i inventory sensu-go.yml
Finally, to verify our monitoring setup, open your web browser and head over to the Sensu Dashboard exposed by the Sensu backend node. In our case, the Dashboard is available at http://192.168.50.2:3000; you should substitute the IP address with the one you put under the backends group in the inventory file. Soon enough, you should observe events associated with the NTP check coming from the Sensu agent deployed alongside our imaginary application server. Despite our initial intuition that the application server is experiencing clock skew, everything seems to be fine in our case! Plus, our goal to observe clock drift on the agent node is achieved.
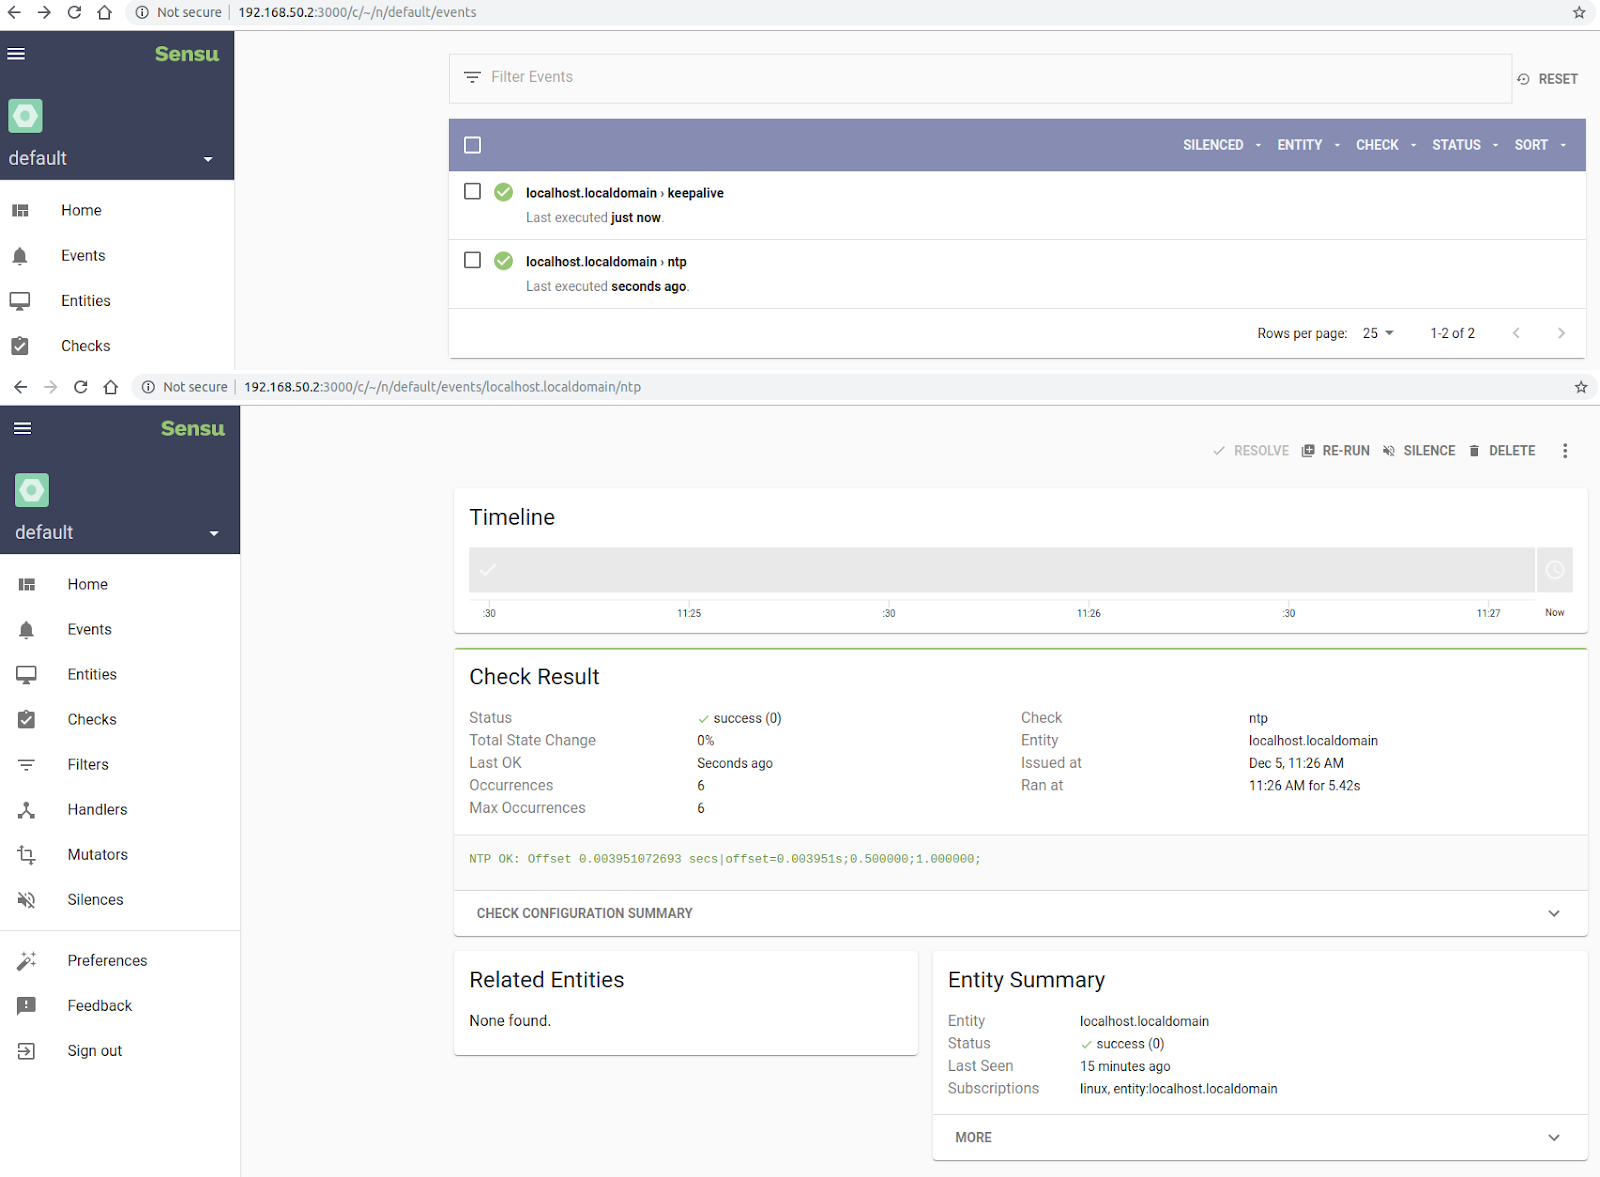
Sensu Go dashboard
Going forward
And there you have it: the installation and basic usage of the Sensu Go Ansible Collection! Although our example setup - a single agent and a single backend - was relatively simple, it should help bring Ansible Collections, as new members of the Ansible family, a bit closer to home. And, despite focusing on Sensu Go, this article touched on various aspects that might come in handy regardless of the collection’s content itself. We hope these will help kick-start the development of your organization’s automation workflows!
Want to know more about the Sensu Go Collection? Wondering if the collection can help you automate monitoring workflows that go beyond the basic usage shown in this article? The answer is yes. We invite you to visit Sensu Go Collection on the Ansible Galaxy portal and see for yourself. Explore the documentation, and take the collection for a spin!
Learn more about our integration with Ansible and how we help partners maintain and certify Ansible Content Collections


