Ansible Collections
Adding integration tests to Ansible Content Collections
June 30, 2020 - Words by Tadej Borovšak - 6 min read

This post was originally published on the Ansible blog .
In the previous installment of our “let us create the best Ansible Content Collection ever” saga, we covered the DigitalOcean-related content migration process. What we ended up with was a fully functioning Ansible Content Collection that unfortunately had no tests. But not for long; we will be adding an integration test for the droplet module.
We do not need tests, right?
If we were able to write perfect code all of the time, there would be no need for tests. But unfortunately, this is not how things work in real life. Any modestly useful software has deadlines attached, which usually means that developers need to strike a compromise between polish and delivery speed.
For us, the Ansible Content Collections authors, having a semi-decent Collection of integration tests has two main benefits:
- We know that the tested code paths function as expected and produce desired results.
- We can catch the breaking changes in the upstream product that we are trying to automate.
The second point is especially crucial in the Ansible world, where one team of developers is usually responsible for the upstream product, and a separate group maintains Ansible content.
With the “why integration tests” behind us, we can focus our attention on how to write them.
Setting up the environment
If you would like to follow along, you will need to have Ansible 2.9 or later installed. You will also need to clone the DigitalOcean Ansible Content Collection . The following commands will set up the environment:
$ mkdir -p ~/digital_ocean/ansible_collections/digital_ocean
$ cd ~/digital_ocean/ansible_collections/digital_ocean
$ git clone \
    https://github.com/xlab-si/digital_ocean.digital_ocean.git \
    digital_ocean
$ cd digital_ocean
$ export ANSIBLE_COLLECTIONS_PATHS=~/digital_ocean
$ ansible-doc digital_ocean.digital_ocean.droplet
If the last command printed the droplet module documentation, you are all set.
Manually testing Ansible modules
The most straightforward integration test for an Ansible module is a playbook that has two tasks. The first task executes the operation and the second task validates the results of the first task.
For example, to test that the droplet module created an instance with the correct parameters, we could use the following playbook.yaml file:
---
- hosts: localhost
  gather_facts: false
  name: Put DigitalOcean's droplet module through its paces

  tasks:
    - name: Create a new droplet
      digital_ocean.digital_ocean.droplet:
        oauth_token: ""
        name: test-droplet
        size: s-1vcpu-1gb
        region: fra1
        image: centos-8-x64
        unique_name: true
        tags: [ ansible, test, tags ]
      register: result

    - assert:
        that:
          - result is success
          - result is changed
          - "result.data.droplet.name == 'test-droplet'"
          - "result.data.droplet.size_slug == 's-1vcpu-1gb'"
          - "result.data.droplet.region.slug == 'fra1'"
          - "result.data.droplet.image.slug == 'centos-8-x64'"
          - "result.data.droplet.tags == ['ansible', 'test', 'tags']"
          - "result.data.droplet.status == 'active'"
To keep our DigitalOcean API token secure, we will place it in a separate file called vars.yaml:
---
do_api_token: 1a2b3c4d5e6f
Make sure you replace the API token with a real one. You can generate one in the API section of the DigitalOceans’s console.
When we run the ansible-playbook -e @vars.yaml playbook.yaml command,
Ansible will print something like this to the terminal:
PLAY [Put DigitalOcean's droplet module through its paces] **********

TASK [Create a new droplet] *****************************************
changed: [localhost]

TASK [assert] *******************************************************
ok: [localhost] => {
        "changed": false,
        "msg": "All assertions passed"
}
PLAY RECAP **********************************************************
localhost        : ok=2       changed=1  unreachable=0  failed=0
                   skipped=0  rescued=0  ignored=0
The main workhorse of the previous example is the assert Ansible module . Each assert’s condition is an Ansible test , and the assert task will fail if any of the listed conditionals evaluates to false.
There are a few other things that we should test: parameter handling, check mode and idempotence, to name a few. We excluded those tests from the blog post for brevity, but feel free to check the full playbook.yaml for more details.
And while manually testing modules is simple, it does not scale to more than a few modules. Usually, we would need to write a script that runs all of the tests. But luckily, Ansible comes bundled with a tool aptly called ansible-test that can do this for us.
Automate the automation tests
The ansible-test knows how to perform a wide variety of testing-related tasks, from linting module documentation and code to running unit and integration tests. But before we can use it, we must prepare a directory structure for it:
$ mkdir -p tests/integration/targets/droplet/tasks
We know that the directory structure is quite heavily nested, but there is a logical explanation for all these directories:
- The tests/integration is where all things related to integration tests live.
- The tests/integration/targets directory contains all our test cases. Each test case is a barebones Ansible role.
- The tests/integration/targets/droplet is the test case that we will be adding today. And since each test case is an Ansible role, it needs to have a tasks subdirectory containing a main.yml file.
Now we can start populating our tests/integration/targets/droplet/tasks/main.yml file. Because we already have the playbook for manually testing the droplet module, creating the main.yml file is as simple as copying the tasks from the playbook.
As for the API token, we can copy the vars.yaml file content to
tests/integration/integration_config.yml and ansible-test will pass any
variables that are defined to our test cases.
And now we are ready to run the tests by executing the following command:
$ ansible-test integration
All that we need to do now is save the changes. But make sure you DO NOT commit the tests/integration/integration_config.yml file since it contains our DigitalOcean credentials.
To give our future selves some hints about the configuration options, we will create a template file, containing placeholders for real values. We will name this file integration_config.yml.template and populate it with the following content:
---
do_api_token: ${DO_API_TOKEN}
And we are done. Bye!
You want to see more, you say? I guess we could look at the GitHub Actions integration for the grand finale. Are you interested? Ok, let’s do it!
Integrating with CI/CD
Tests are useless if no one is running them. And since we all know that you cannot trust a programmer to run them locally, we will instead run them on the GitHub-provided CI/CD service.
It turns out that all we need to get things going is the following .github/workflows/test.yaml file:
name: Run DigitalOcean Ansible Integration Tests
on: [ push ]
jobs:
  integration:
    runs-on: ubuntu-latest
    defaults:
      run:
        working-directory: ansible_collections/digital_ocean/digital_ocean

    steps:
      - name: Clone the repo
        uses: actions/checkout@v2
        with:
          path: ansible_collections/digital_ocean/digital_ocean

      - name: Set up Python 3.7
        uses: actions/setup-python@v2
        with:
          python-version: 3.7

      - name: Install Ansible
        run: pip install ansible

      - name: Configure integration test run
        env:
          DO_API_TOKEN: ${{ secrets.DO_API_TOKEN }}
        run: |
          ./tests/utils/render.sh \
            tests/integration/integration_config.yml.template \
            > tests/integration/integration_config.yml

      - name: Run the integration tests
        run: ansible-test integration --python 3.7
The only exciting step in the workflow is the fourth one. It is responsible for creating the configuration file that contains our DigitalOcean API token. Consult the render.sh script for the gory details of template rendering.
And where is the token stored? In the GitHub’s repository secrets storage. The official documentation lives here .
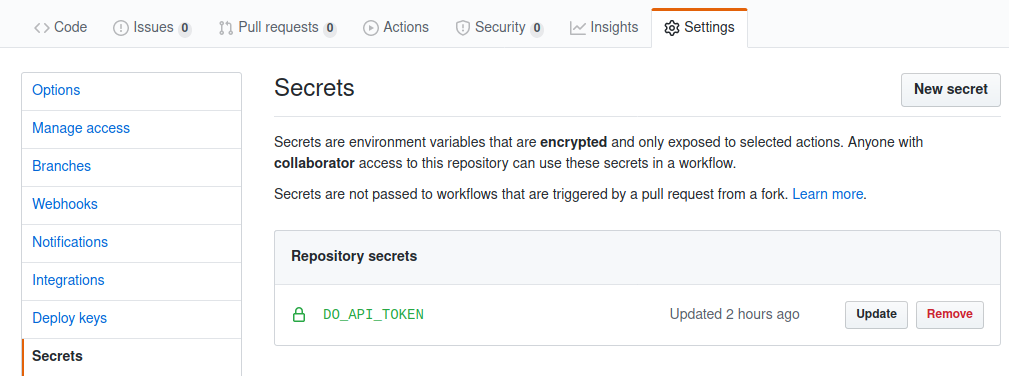
GitHub's secresta part of the settings.
Once we have our secrets in place and workflow description committed, we can push our changes to GitHub and enjoy some well-deserved Jenkins cinema.
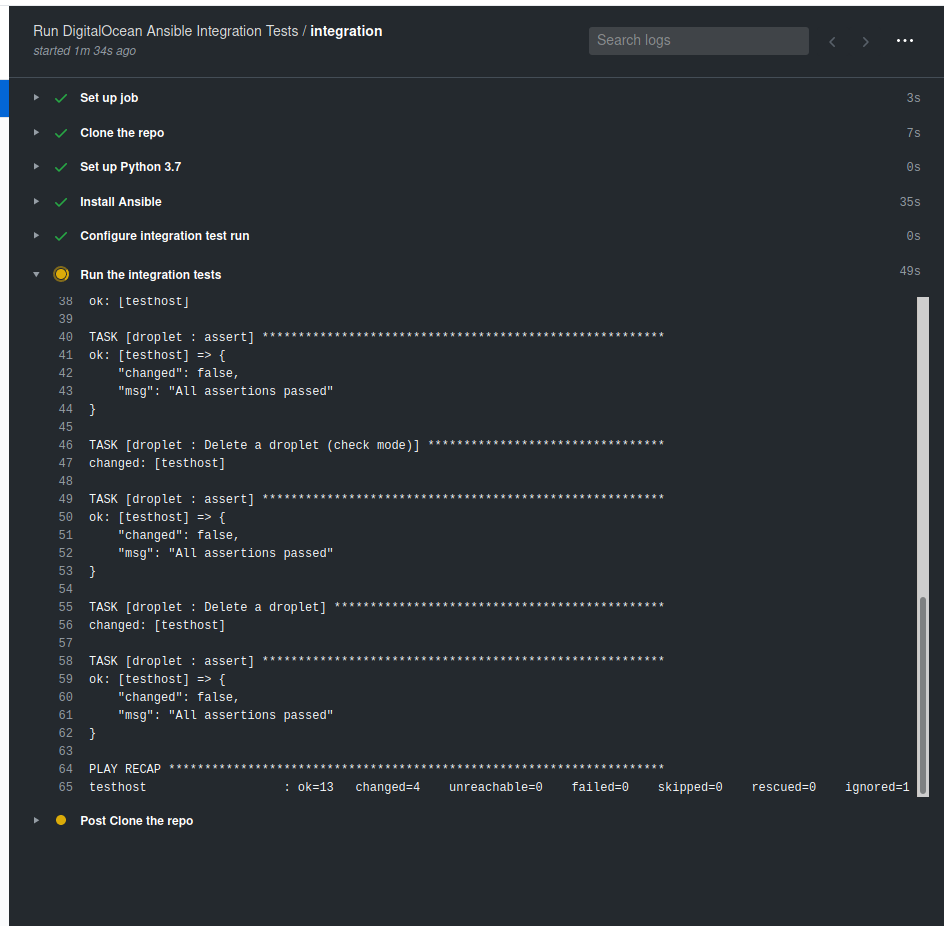
Sample output from the GitHub Actions in action ;)
Is there more?
We have just scratched the surface when it comes to testing. And while having integration tests for modules is a great start, there are other things that we should test if we are serious about creating a robust Ansible Content Collection. If you want to learn more, we recommend watching our Intro to testing Ansible Collections webinar .
And if you need help creating and upgrading your Ansible content, reach out and our experts will gladly help you out.
Cheers!


